


A mid taper fade buzz cut is one of the few men’s haircuts that works in a boardroom, a gym, and a barbershop chair with almost no explanation needed. It pairs a short, even buzz on top with a fade that starts around the middle of the ear and blends down toward the neckline and temples. The result is clean, low maintenance, and flattering on nearly every hair type and face shape.
This guide breaks down what the cut actually is, the five most requested variations, the clipper guards you need for each length, and a full step-by-step process for cutting it at home. Whether you’re booking a barber appointment or picking up clippers for the first time, you’ll know exactly what to ask for and how to get it right.
What Is a Mid Taper Fade Buzz Cut?

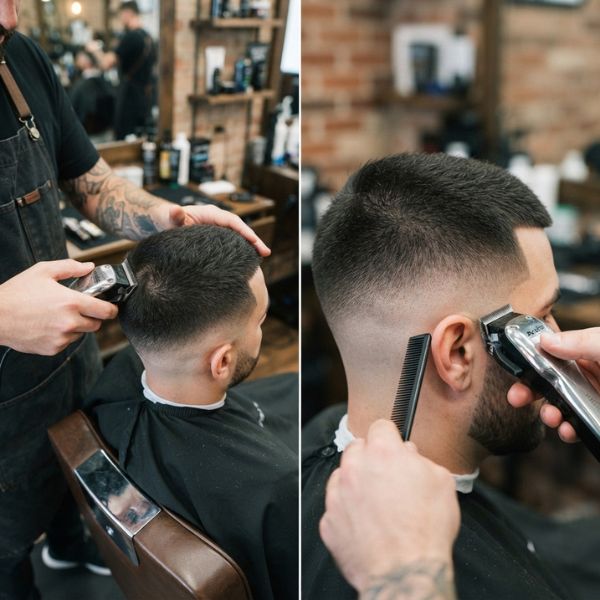
A mid taper fade buzz cut combines two elements: a buzz cut on top and a taper fade on the sides and back.
The “buzz” part means the top is cut with a single clipper guard, usually somewhere between a #2 and a #4, leaving short, even hair with no need for a comb or styling product. The “mid taper” part refers to where the fade begins. Instead of starting high on the head (a high fade) or barely above the ear (a low fade), a mid fade starts roughly level with the middle of the ear and gradually shortens down to the hairline, temples, and nape.
This middle starting point is what makes the cut so versatile. It creates enough contrast to look sharp and intentional, without the dramatic, high-shine skin fade that some workplaces or personal styles don’t suit.
Quick comparison of fade heights:
| Fade type | Where it starts | Contrast level |
|---|---|---|
| Low fade | Near the earlobe and nape | Subtle, barely noticeable |
| Mid fade | Middle of the ear | Balanced, noticeable but not extreme |
| High fade | Above the temple, near the top of the head | Bold, high contrast |
Why Mid Taper Fade Buzz Cut Is So Popular in 2026
The mid taper fade buzz cut has held its place as one of the most requested men’s cuts for a few practical reasons.
- Low maintenance. There’s no product, no blow-drying, and no daily styling required. Run a hand through it and you’re done.
- Works with every hair type. Straight, wavy, curly, and coily hair all take a buzz and taper well, since the cut relies on length rather than texture control.
- Flattering on most face shapes. The tapered sides slim the appearance of a round face and add structure to an oval or square jawline.
- Beard and hairline friendly. The gradual fade blends cleanly into a beard line or a receding hairline, which makes it a common choice for men managing thinning hair.
- Fast regrowth window. Because the top is already short, the cut grows out gracefully and doesn’t need a touch-up as often as a skin fade does.
- Professional and casual at once. It reads as tidy in an office setting but doesn’t feel overly formal for everyday wear.
These are also the exact traits that keep the style trending across barbershop reference boards and grooming searches every year: it’s dependable rather than flashy, which is what most men actually want from a haircut.
Read more: 10 Best Mid Taper Fade with Design Ideas for Men (2026)
5 Mid Taper Fade Buzz Cut Variations
Not every mid taper fade buzz cut looks the same. The guard used on top, the texture left behind, and how tight the sides are cut all change the finished look. Here are five of the most common variations.
1. Classic Buzz with Mid Taper Fade
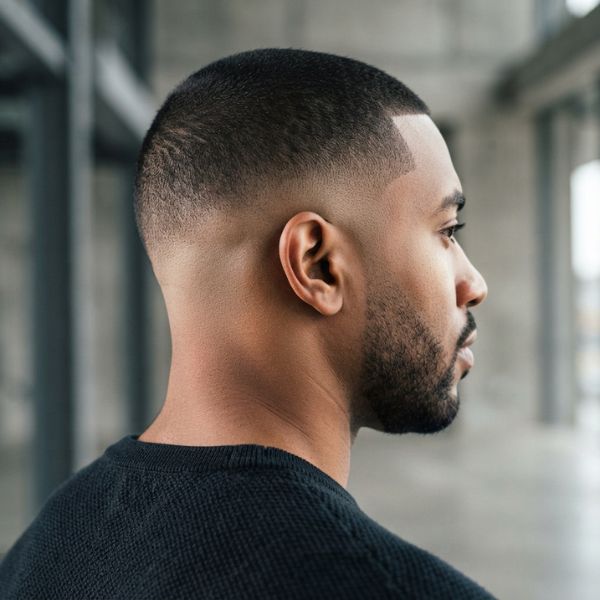
The most requested version. The top is buzzed evenly with a #2 or #3 guard, and the sides taper down from the middle of the ear to a #1 or skin finish at the hairline. It’s symmetrical, simple, and easy to maintain between cuts. This is the safest option for a first-time buzz cut or a first attempt at DIY clipper work.
2. Burr Cut with Mid Taper Fade
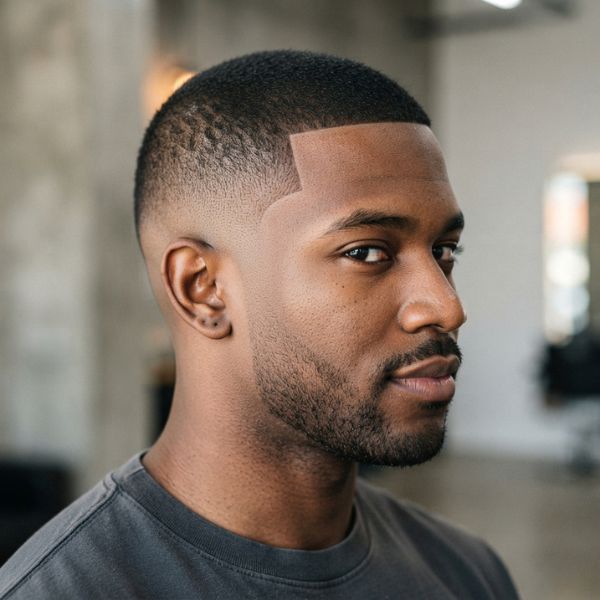
A burr cut takes the top down to a #1 or shorter, almost matching the shortest part of the fade. The difference between the top and the sides becomes minimal, giving a nearly uniform, military-inspired look. It’s the lowest maintenance version of the style and suits men who want to spend as little time as possible on their hair.
3. Textured Buzz with Mid Taper Fade

Instead of a completely flat, even top, a textured buzz uses point-cut or thinning shears (or a texturizing clipper attachment) to add slight movement and depth to the top while keeping the sides on a standard mid taper fade. It photographs well and adds a touch more personality without abandoning the low-maintenance appeal.
4. High-and-Tight with Mid Taper Fade

A high-and-tight typically pairs a very short top, often a #1 or #2, with an aggressive taper. When adjusted to a mid starting point instead of high on the crown, it softens the contrast slightly while keeping the disciplined, sharp look associated with military and athletic cuts.
5. Skin Buzz with Mid Taper Fade
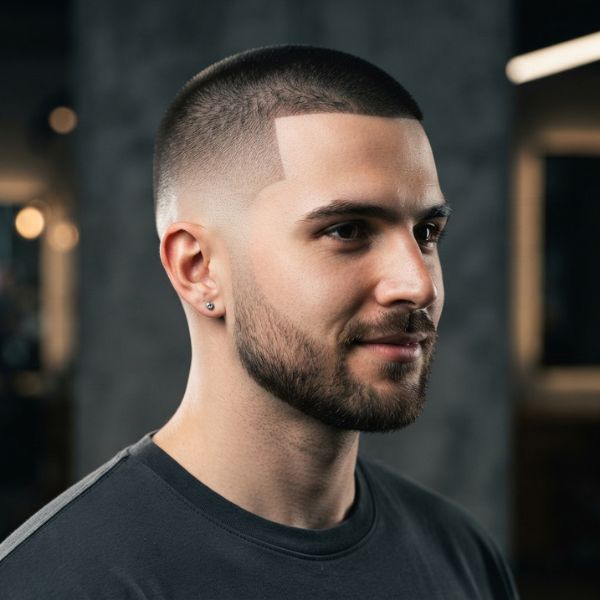
The top is buzzed close, similar to a burr cut, but the sides fade all the way down to bare skin near the hairline and neckline instead of stopping at a short guard length. This is the most dramatic of the five variations and gives the cleanest possible line. It requires more frequent touch-ups since the skin fade grows out faster than the other versions.
Guard Numbers & Clippers for a DIY Buzz Cut
Getting the right length starts with understanding what each guard number actually leaves behind. Below is a practical breakdown for the top length, followed by clipper and tool recommendations for the fade itself.
Read more: Mid Taper Fade avec frange : Guide complet des styles et des longueurs (2026)
Guard Number Chart for the Top
| Guard number | Length left | Best for |
|---|---|---|
| #1 | 1/8 inch (about 3 mm) | Burr cut, high-and-tight, very low maintenance |
| #1.5 | 3/16 inch (about 4.5 mm) | Blending step between short guards |
| #2 | 1/4 inch (about 6 mm) | Classic buzz cut length, the most common choice |
| #3 | 3/8 inch (about 10 mm) | Slightly fuller buzz with a bit more coverage |
| #4 | 1/2 inch (about 13 mm) | Longer buzz, more room for texture styling |
Choosing Clippers for a Buzz Cut
Not every clipper is built for fading, so a few features matter more than brand names:
- Adjustable taper lever. This lets you shift length in small increments without swapping guards constantly, which is essential for blending.
- Cordless with a strong battery. A buzz cut and fade combined can take 20 to 40 minutes; a clipper that slows down mid-cut ruins the blend.
- Sharp, zero-gap or close-set blades. These allow for the tight, skin-close work needed at the hairline and nape.
- A full guard set, including half sizes. The #0.5 and #1.5 guards are what make a fade look gradual instead of stepped.
Tools That Make the Blend Easier
A clean mid taper fade depends as much on technique and tools as it does on the clippers themselves:
- A separate trimmer for sharp lines around the ears, neckline, and hairline.
- A three-way or handheld mirror so you can check the back and sides while cutting your own hair.
- A fade brush or blending comb to soften harsh lines between guard lengths.
- A cape or old towel to keep loose hair off your neck and clothing during longer sessions.
- Clipper oil to keep blades gliding smoothly, especially important when working through multiple guard changes in one sitting.
How to Do a Mid Taper Fade Buzz Cut at Home
Cutting your own mid taper fade is realistic with the right setup, patience, and a willingness to go slow. Here’s the process broken into clear steps.
Read more: Dégradé Effilé Mi-Haut pour Cheveux Bouclés — Les 17 Meilleurs Styles & Guide d’Entretien (2026)
Step-by-Step DIY Process
- Start with clean, dry hair. Wet hair clumps and misleads you about the actual length left behind.
- Buzz the top first. Attach your chosen top guard (commonly a #2 or #3) and go against the direction of hair growth in even, overlapping passes.
- Mark the taper starting point. Find the middle of your ear on both sides and use that as your guide for where the fade begins.
- Cut the longest fade guard first. Starting at that mark, use a guard one size shorter than your top length and move downward, lifting the clipper slightly at the end of each stroke to blend.
- Step down through shorter guards. Move to the next shorter guard and repeat the same motion slightly lower on the head, overlapping the previous line by a small margin each time.
- Finish at the hairline and nape. Use a #0.5 or the bare blade for the final, closest section near the hairline, ears, and neckline.
- Blend with upward flicking strokes. Go back over the transition zones with quick, light upward motions to soften any visible lines between guards.
- Clean up the edges. Switch to a trimmer to sharpen the hairline, sideburns, and neckline.
- Check from multiple angles. Use a mirror setup to inspect both sides and the back before calling it finished.
Common DIY Mistakes to Avoid
- Skipping guard sizes. Jumping from a #3 straight to skin creates a visible, stepped line instead of a smooth fade.
- Cutting too fast. Rushing the blend is the single biggest reason DIY fades look uneven.
- Uneven pressure on the clipper. Pressing harder on one side than the other leads to asymmetry that’s hard to fix afterward.
- Ignoring the back of the head. Many at-home cuts look fine from the front and rough at the nape simply because it’s harder to see.
- Not oiling the blades. Dull or dry blades pull hair instead of cutting cleanly, especially frustrating on thicker or coarser hair.
When to See a Professional Instead
Some situations are better left to a barber, at least for the first attempt:
- You want a skin fade with an extremely sharp, high-contrast line.
- Your hair is very thick, curly, or coily and prone to uneven clipper tracking.
- You have cowlicks, scars, or an uneven hairline that need specific technique to work around.
- It’s for a special occasion where there’s no margin for a DIY mistake.
Professional Barber vs DIY: Cost & Time Comparison
| Factor | Professional Barber | DIY at Home |
|---|---|---|
| Average cost | $25 to $60 per visit | One-time clipper cost, roughly $30 to $150 |
| Time per cut | 20 to 45 minutes | 20 to 40 minutes, longer while learning |
| Consistency | High, especially with a regular barber | Varies until technique improves |
| Skin fade quality | Typically sharper and more even | Achievable with practice, harder on the first few tries |
| Long-term cost | Adds up with frequent visits, especially for skin fades | Lower over time once you own the tools |
Is It Worth Cutting a Buzz Cut Yourself?
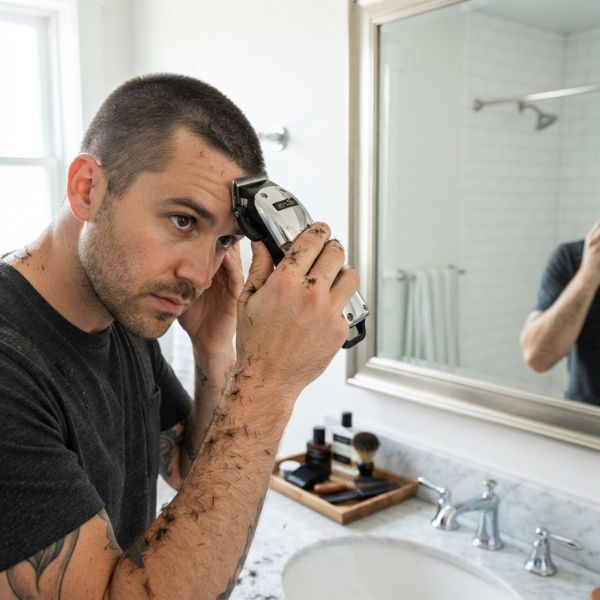
For a classic buzz or burr cut with a mid taper, doing it yourself is very achievable and saves real money over a year of biweekly barber visits. For a skin buzz or a high-contrast fade, the margin for error is smaller, and many men still prefer a barber for that specific finish while handling simpler maintenance cuts at home in between visits.
Mid Taper Fade Buzz Cut: Video Guide

Reading through the steps is useful, but watching the clipper angles and blending motion in real time makes the technique click faster. Look for tutorials that show the full process from a side and back angle, not just the front, since most fading mistakes happen where you can’t easily see them on yourself.
Watch: Mid Taper Fade Buzz Cut Tutorial
When searching for a tutorial, prioritize videos that clearly show the guard changes step by step and include a slow-motion or close-up section on blending the transition zones. Search terms like “mid taper fade buzz cut tutorial” or “mid fade buzz cut at home” will pull up current barber demonstrations you can pause and follow along with as you cut.
Frequently Asked Questions
How often do I need a touch-up on a mid taper fade buzz cut?
Most men need a touch-up every 2 to 3 weeks, since the taper grows out faster than the buzzed top.
Does a mid taper fade buzz cut suit curly or coily hair?
Yes, the cut works well on curly and coily textures because the length is controlled by the guard rather than the natural curl pattern.
What guard number is best for a first-time buzz cut?
A #2 or #3 on top is the safest starting point, since it’s short but not so tight that mistakes are hard to fix.
Can I do a mid taper fade on my own hair without help?
Yes, with a mirror setup and a steady hand, though the back of the head is easier with a second person or a well-angled handheld mirror.
Is a mid taper fade the same as a mid skin fade?
No, a mid taper leaves a short guard length at the bottom of the fade, while a mid skin fade goes all the way down to bare skin.
How long does hair need to be before getting a mid taper fade buzz cut?
Any length works, since the buzzed top and tapered sides are both cut down rather than built up from longer hair.
About the Author
This guide was written by a grooming and men’s hairstyling content specialist with hands-on barbering experience and a focus on practical, at-home haircare guidance. The recommendations here are based on standard barbering technique and widely used clipper guard conventions rather than a single brand or product line.
Conclusion
A mid taper fade buzz cut earns its popularity by being genuinely low effort without looking careless. It suits nearly every hair type and face shape, takes well to a beard or a clean shave, and grows out without demanding a barber visit every week. Whether you go with a classic buzz, a tight burr cut, or a dramatic skin fade, the same core principle applies: pick your top guard, find the middle of your ear as your fade starting point, and blend patiently through the guard sizes rather than skipping between them. Get that right, and the cut will look sharp whether a barber did it or you did it yourself in your own bathroom.

Reyansh is an experienced fashion writer with 6+ years of writing experience, passionate about fashion trends, styling ideas, and modern looks. He creates simple, engaging content that helps readers discover their personal style with confidence.